Organic Gardens Course #1: Learn the Basics and Learn How to Plan Yours
Follow this organic gardens course and learn all about making organic gardens at home

Stan Petersen image by Pixabay
With the growth of the world population, it became necessary to increase food production and make it bigger and more resistant to pests. For this, fertilizers and pesticides were created, which would increase productivity and protect food, but these chemicals have negative effects on human health and the environment. So, if you want to consume food without pesticides, have a healthier life, save at the supermarket and also help the environment, don't miss this course that will teach you how to make your own organic garden in eight classes (see more about the benefits of agriculture organic here).
In this article, we'll look at the principles of organic agriculture, how it works, how to plan a garden, and give important information about organic gardens.
What does it take to have an organic garden?
- Lots of sun. An area where there is approximately eight hours of sunlight a day will make your vegetables grow big and healthy. One way to analyze the planting site is to observe whether the sun shines on the site in winter at midday;
- It is necessary to have a water source nearby so that there are no problems when watering the garden;
- A place for the domestic composter, which will provide the compost to put on the land (see how to make compost here).
How to know if the soil is suitable for a vegetable garden?
- Analyze if there is any tree or something that prevents full exposure to the sun around;
- It is necessary to know if the soil drains and which parts are low, as we must not use waterlogged terrain;
- If the land has good vegetation cover, it is known that it is moderately fertile for planting.
What are the principles of an organic garden?
- Association of various types of vegetables so that one benefits from the other, but they must not compete for nutrients. For example, shade-loving species can be cultivated alongside shade-loving ones;
- It is important to rotate crops so as not to deplete the soil's nutrients. Assuming that a beetroot (tubular vegetable) is planted in a bed, this bed should be sown with another type of vegetable next time, such as lettuce (leaf vegetable). Crop rotation also prevents the appearance of pests;
- Fertilizer from the compost to enrich the soil with nutrients and assist in the development of microorganisms that will help plant growth.
Important informations
- The vegetable garden should be placed in a north-south direction, to make the best use of sunlight;
- It is not all the space reserved for the garden that will be planted, within the selected space will be made planting beds;
- The soil between the beds should be covered with dry leaves to prevent soil erosion by wind, prevent sun drying and protect against weed growth;
- The soil must be soft and porous allowing the penetration of water, air and roots;
- It is important to place flowers or aromatic plants at the head (end) of the beds. The marigold, for example, if planted at the head of a flower bed, attracts insects that would go to other vegetables;
- There are several types of vegetables, such as hardwoods, fruits, tuberoses and spices. The types must be changed from season to season (crop rotation) and you must choose those vegetables that best adapt to the time of year and climate;
- It is important to pay attention to the crop cycle, for example, if lettuce is planted in a bed, you should not plant all the seedlings at once, because later on all the plants will be good to be harvested on the same date and there will be waste.
Materials to outline your organic garden
- Wire or thread;
- Piles;
- Hammer or sledgehammer;
- Dough;
- rake or rake;
- Hoe or hoe;
- Garden fork;
- Measuring tape.
Step by step
The video on which this course was based indicates the use of an area of 10 m x 10 m to meet the needs of a family of five; however, to facilitate and adapt the measures indicated, we will use an area of 10 m x 10.2 m to illustrate the step by step, but you can make the size that fits in your house. Then, with the help of a measuring tape, measure an area of 10 m x 10.2 m and place stakes in the four corners, to pass a line between the stakes and delimit the area of the garden.
It is interesting to leave a space of 60 cm to make a living fence before the growing beds, so make another mark with 9 m x 8.8 m.
Then, to delimit the cultivation beds, pay attention to the position of the sun, as we have to place the beds in a north-south position to make the best use of the sun's rays. Let's mark an area approximately 1.2 m wide with line and stakes as well. Its width should be ideal so that when crouching beside the bed you can reach half of it with your hand. The length must be 7.8 m, that is, 100 cm shorter than the length of the garden hedge, this to leave a space of 50 cm between the edge of the bed and the edge of the garden so that it is possible to walk between the flowerbeds.
Each 1.2 m bed will be separated from the others by a space of 50 cm as well, because when walking between the beds the soil will be compacted.
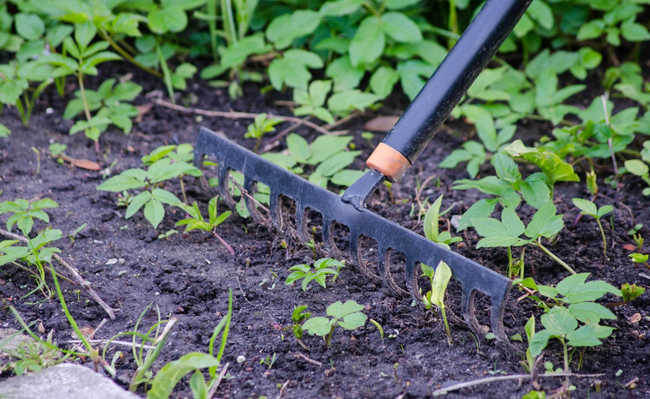
With a hoe, remove the remaining plants such as grass and weeds from the bed, without turning the earth over too much, as the first 10 cm of soil contain micro-organisms that will be allied to our garden, providing important nutrients. Then, with the rake, gather the weeds to be collected and, finally, make the soil softer with the garden fork.
The image above represents the layout of the beds, with striped green being the hedge area, light green being the free area for walking between the beds, and brown being the area of the beds.
Curiosity
See below a planting calendar, according to Embrapa's Brazilian Vegetable Calendar, which are the best months for planting each vegetable.
| Popular name | South | Southeast | North East | Midwest | North | Cycle (days) |
|---|---|---|---|---|---|---|
| Pumpkin | Oct./Feb. | Sept./Mar. | Mar./Oct. | Whole year | Apr./Aug. | 90-120 |
| italian zucchini | Sept./May | Aug./May | Mar./Oct. | Whole year | Apr./Aug. | 45-60 |
| Chard | Feb./Jul. | Feb./Jul. | - | - | Apr./Jun. | 60-70 |
| Cress | Feb./Oct | Feb./Jul. | Mar./Sep. | Mar./Jul | Apr./Jul. | 60-70 |
| Artichoke | Feb./Mar. | Feb./Mar. | - | - | - | 180-200 |
| winter lettuce | Feb./Oct. | Feb./Jul. | Mar./Sep. | Mar./Sep. | Mar./Jul. | 60-80 |
| summer lettuce | Whole year | Whole year | Whole year | Whole year | Whole year | 50-70 |
| Garlic | May/Jun. | Mar./Apr. | May | Mar./Apr. | - | 150-180 |
| Leek | Mar./Jun. | Mar./Jun. | May/Jun. | Apr./Jun. | - | 90-120 |
| Almeirão | Feb./Oct. | Feb./Aug. | Feb./Aug. | Feb./Aug. | Apr./Apr. | 60-70 |
| Potato | Nov./Dec. | Apr./May | - | Apr./May | - | 90-120 |
| Sweet potato | Oct./Dec. | Oct./Dec. | Whole year | Oct./Dec. | Whole year | 120-150 |
| Aubergine | Aug./Jan. | Aug./Mar. | Whole year | Aug./Feb. | Apr./Aug. | 100-120 |
| Beetroot | Whole year | Whole year | Apr./Aug. | Apr./Aug. | - | 60-70 |
| winter broccoli | Feb./Sep. | Feb./Jul. | - | Feb./May | - | 90-100 |
| summer broccoli | Oct./Dec. | Sept./Jan. | Oct./Feb. | Oct./Jan. | Apr./Jul. | 80-100 |
| Onion | Jul./Aug. | Feb./May | Feb./Apr. | Feb./May | Feb./May | 120-180 |
| Scallion | Whole year | Whole year | Mar./Jul | Apr./Aug. | Apr./Oct. | 80-100 |
| winter carrot | Feb./Aug. | Mar./Jul. | - | Apr./Jul. | - | 90-110 |
| summer carrot | Nov./Jan. | Oct./Mar. | Oct./Mar. | Oct./Mar. | Oct./Mar. | 85-100 |
| Chicory | Feb./Jul. | Feb./Jul. | Feb./Aug. | Apr./Jun. | Mar./Aug. | 60-70 |
| Chuchu | Sept./Oct. | Sept./Oct. | Whole year | Sept./Oct. | Apr./Jul. | 100-120 |
| Coriander | Sept./Jan. | Aug./Feb. | Whole year | Aug./Apr. | Apr./Oct. | 50-60 |
| Cabbage Butter | Feb./Jul. | Feb./Jul. | Apr./Aug. | Feb./Jul. | Apr./Jul. | 80-90 |
| Chinese cabbage | Whole year | Whole year | Mar./May | Mar./May | - | 60-70 |
| Winter Cauliflower | Feb./Jun. | Feb./Apr. | Feb./Jul. | Feb./Jul. | - | 100-110 |
| Summer Cauliflower | Dec./Jan. | Oct./Feb. | Nov./Dec. | Oct./Jan. | Nov./Feb. | 90-100 |
| Pea | Apr./May | Apr./May | - | Apr./May | - | 60-70 |
| Spinach | Feb./Sep. | Feb./Sep. | Mar./Aug. | Mar./Aug. | Mar./May | 60-80 |
| Beans Pod | Sept./Mar. | Aug./Mar. | Whole year | Mar./Aug. | Apr./Jul. | 60-70 |
| Yam | Jun./Sep. | Jun./Sep. | Dec./Jan. | Jul./Aug. | Jun./Sep. | 150-180 |
| Scarlet eggplant | Sept./Feb. | Aug./Mar. | Mar./Sep. | Apr./Aug. | Apr./Aug. | 90-100 |
| Cassava-parsley | Apr./May | Apr./May | - | Apr./May | - | 300-360 |
| watermelon | Sept./Jan. | Aug./Mar. | Mar./Sep. | Sept./Dec. | Apr./Aug. | 85-90 |
| Melon | - | Sept./Feb. | Mar./Sep. | Sept./Dec. | Apr./Aug. | 80-120 |
| Green corn | Aug./Feb. | Sept./Dec. | Oct./Mar. | Sept./Jan. | Mar./May | 80-110 |
| Squash | Sept./Dec. | Sept./Dec. | Mar./Jun. | Sept./Dec. | - | 120-150 |
| Strawberry | Mar./Apr. | Mar./Apr. | - | Feb./Mar. | - | 70-80 |
| Turnip | Apr./May | Jan./Aug. | Feb./Jul. | Feb./Jul. | Apr./Jul. | 50-60 |
| Cucumber | Sept./Feb. | Sept./Feb. | Whole year | Jul./Nov. | Apr./Sep. | 45-60 |
| chili | Sept./Feb. | Aug./Mar. | Whole year | Aug./Dec. | Jul./Dec. | 90-120 |
| Bell pepper | Sept./Feb. | Aug./Mar. | May/Sep. | Aug./Dec. | Apr./Jul. | 100-120 |
| Okra | Oct./Dec. | Aug./Mar. | Whole year | Aug./Feb. | Whole year | 70-80 |
| Radish | Mar./Aug. | Mar./Aug. | Mar./Jul. | Apr./Sep. | Mar./Aug. | 25-30 |
| winter cabbage | Feb./Sep. | Feb./Jul. | Feb./Jul. | Feb./Jul. | - | 90-110 |
| summer cabbage | Nov./Jan. | Oct./Feb. | Whole year | Oct./Feb. | Mar./Sep. | 90-110 |
| Arugula | Mar./Aug. | Mar./Aug. | Mar./Jul. | Mar./Jul. | - | 40-60 |
| Parsley | Mar./Sep. | Mar./Sep. | Mar./Aug. | Mar./Aug. | - | 60-70 |
| Tomato | Sept./Feb. | Whole year | Whole year | Whole year | Mar./Jul. | 100-120 |
If you live in an apartment or don't have space in your house, you can still have a vegetable garden in the window! See how this is possible here.
Check out the video on which this article was based, prepared by Borelli Studio. The video is in Spanish, but there is the possibility of activating subtitles in Portuguese.


